Photography Tips
Food Photography Tips & Tricks – Behind the Scenes
On the internet, there are plenty of viral videos, such as this one created by 5 Minute Crafts, that tries to guess the unconventional methods that are used when crafting the perfect plate – but how much of it is real?
Sue Atkinson is a professional Food and Drink Photographer who has previously shot for Krispy Kreme, Warburtons, McCain’s, Tetley and McDonalds. Sue shares her technical advice and discusses what really goes on behind the scenes of food photography.
Find out Sue’s top tips when it comes to food and drink photography below.
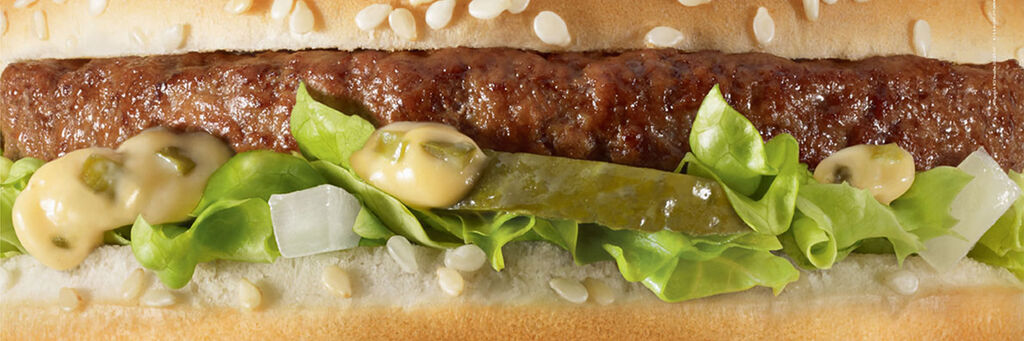
Photography Tips for Meat
Lighting to keep the texture is one of the key things about shooting food – and one of its main appetite appeals. Plan your props and make sure your lighting is going to work. If you want to cut a slice from a joint, make sure the light will be set at an angle where it picks up the texture and where it’s not flat on or in shadow. Shoot it quickly before it wrinkles and loses its fresh, warm hues!

Meat is best photographed when it’s still warm. This is because it looks plump before it begins to dry out. But when it does cool down and begins to dry, you can keep it moist by brushing with very hot water or a little bit of oil. This will help keep the natural shine. Once the fibres begin to dry out and the fat begins to coagulate, it is difficult to make meat look appetising in a photograph. Therefore, it’s best to photograph meat that’s been under-cooked as the outside appears cooked, but the overall shape is retained.
One of the most difficult items to shoot is a whole fowl. This is largely because, when it is cooked, the flesh shrinks and the skin expands so when it cools down you’re left with a lot of wrinkly gaps! A lot of liquid will also seep out of a properly cooked bird which looks most unappealing. For most photographic purposes, they are never cooked through, usually browned with a variety of mixtures including paint, caramel, gravy-browning or marmite. I have even heard of boot polish being used!

The skin is sometimes tightened by pouring boiling water over the whole bird. A carefully applied heat gun can help touch up the desired golden effect but this requires skill and practise – it’s very easy to end up with charred patches!
If you want to enjoy your Christmas dinner, don’t try making an idealised food photo of it – just shoot it for fun and see how it compares to the ads!
Photography Tips for Savoury Dishes
Don’t overcook pies and quiches and shoot as soon as you can once they are out of the oven. Otherwise, the fat in the pastry begins to congeal and forms a rather grey hue. However, you can brush them with a light oil to keep the shine. If you are cutting into them, use a very sharp knife to avoid mess (but I think a few crumbs are always appealing!)

Pies tend to be very tricky if you are cutting into them as – even if there is a good amount of filling – it’s seldom where you actually want it! Prepare extra cooked filling and gravy that you can ease into the cut space but remember to make it echo the cut you have made, or it will inevitably look false. Some sort of pipet or meat baster is useful for dribbling gravy where you want it to be. Let some fall out on to the plate as it’s much more appetising that way. If the pastry collapses, it is sometimes possible to cut a section from another pie and carefully ‘transplant’ it. It all depends on how much time and patience you have – and the effect you want!
Photography Tips for Fruit and Vegetables
Fruit and vegetables are among my favourite things to shoot. As with meat and savouries, if you are photographing them cooked, you need to under-cook them so that they retain their shape, texture and colour. With vegetables, it is a good idea to blanch them by lightly cooking and then dousing with cold running water which refreshes the colour. If you are grilling or roasting them, a light brush of oil may help. My best advice would be to enjoy the natural imperfections.
Raw fruit and veg are a visual delight – nature at its best. My best advice would be to enjoy the natural imperfections. Also, try to buy produce which is really fresh – pick it yourself if you can – and include a few leaves (which you can use as a little prop if the picture is looking bit stark without.)

The selection of backgrounds is particularly important. Look out for things that are unobtrusive such as old worn wood, painted surfaces, stone or slate and metal – old baking trays can also work a treat too! Play around with shooting your subjects as a group and then get in closer and really explore the macro qualities. These are among the few food items that will sit still for you fairly happily! Sometimes a little spritz with fresh water or a mix of water and glycerine adds a bit of extra interest (but don’t overdo it…)
Photographing Drinks
Photographing drinks brings two challenges – the drink and its container! From cold to hot, there are all the visual variations of the different properties of liquids, from ice to steam with condensation, bubbles, drips, dribbles, swirls and splashes in between. Then, there are all the fabulous colours of the drinks available to us such as the golden browns of beer, coffee and whisky to all the luscious fruit drinks and cocktails. Almost every colour is represented.

Choose your glasses carefully and check the reflections by doing a rough set-up to check for potential problems. You may find it useful to carefully place a piece of white card behind your glass to bounce the light back into the liquid. Make use of the fridge and the kettle – make cold drinks really cold to help achieve condensation and pour hot drinks at the very last minute if you want to capture steam.
Ice Cream or Mashed Potato?

I am often asked about shooting ice-cream. Do we use mashed potato? Generally, ice cream is actually ice cream! If you want a bit of melt, it’s really the only thing to use. However, when we are shooting scoops or balls of ice cream, we make them first and then freeze them in a container with dry ice. This extends the working time. However, I have also worked with a mixture of lard and icing sugar which is surprisingly effective, yet revolting and very difficult to clean up afterwards!
I think the most difficult thing to shoot is pizza. You really need to shoot it hot, but it has a nasty habit of cooling down very quickly. It was terrible in the days we had to wait 60 seconds for a Polaroid to process before we could shoot film…
Kit Recommendations for Food Photography
With regards to kit for the amateur, I would suggest any simple camera with standard and macro – or close-focusing short telephoto – lenses. A solid tripod is a must when you are photographing close-up and want to get a good depth of field. As a simple reflector, it’s hard to beat a piece of white polystyrene – the sort that household goods come packed with – and some black card to block off areas of light and reflections where you don’t want them. The silver card out of chocolate boxes is great for bouncing tiny patches of light too!

Starter Kit
- Simple stands to prop up your reflector/s
- Masking tape
- A pair of tweezers for moving delicate items in awkward spaces
- A small paint brush for removing crumbs
- A small spray container for spritzing
- If you can’t afford to buy a single studio flash with reflectors, you can get great results shooting by daylight from a window. Find some tracing paper to stick across it as a diffuser if the light is too strong. Try to work with the manual settings on your camera and experiment with different aperture/shutter speed combinations to get effects that you like.
Create Your Own Food Photography CEWE PHOTOBOOK
Do you have a selection of photographs that deserve their own moment to shine? Or maybe you have been inspired by Sue's portfolio and want to create your own cook book? With six paper types, five cover options and nine sizes to choose from, there is a CEWE PHOTOBOOK for every occasion.

Enjoy 10% off Europe’s most loved photo book
- Plus, receive a 10% welcome discount on your first CEWE PHOTOBOOK.
Please check your email
Please confirm your subscription by clicking the link in the email you will receive shortly.
You can cancel your subscription at any time by clicking the unsubscribe button, or by changing your preferences in your Account.
We're sorry
Unfortunately, we were not able to sign you up for our newsletter. Please try again later.


