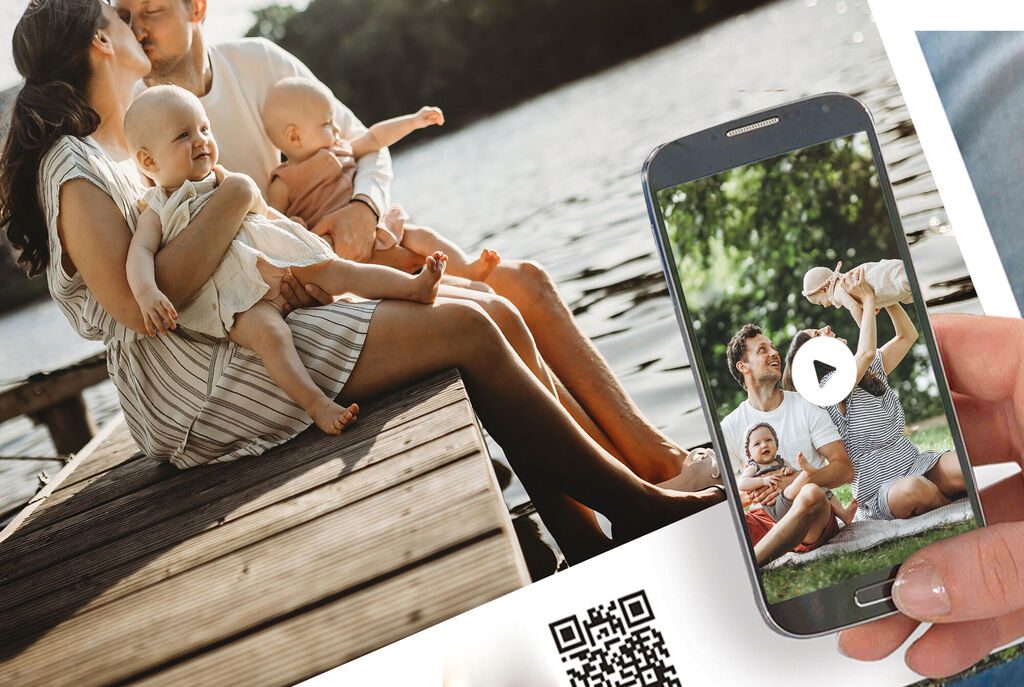
Order Status
Contact us
01926 463 107

My account

Sign in with your credentials, or register for a new account
When you log out, all unsaved projects and your shopping cart will be deleted for security reasons.
An open CEWE PHOTOBOOK lies on a table next to a sofa. On the left side there is a photo of Malta's architecture, on the right side there is also a video via QR code.

Beginner's Guide

How to add video to your CEWE PHOTOBOOK and bring your story to life

Preserve far more than just still images in your next CEWE PHOTOBOOK by adding video. With video storage packages of up to 30 years, your memories will be stored safely to be enjoyed for years to come.

Watch: How to add a video to your photo book

A step-by-step on how to add video to your photo book

You can add video to your photo book just as easily as you add photos by following our step-by-step guide below.

Step 1: Select the video you wish to include in your photo book

Select the video from your folder and import it into the CEWE Creator Software. Video files are displayed with film strip on the edges. Drag the video to the desired page. The video will display as a still image with film strip on the edge and a small QR code will also appear.

Screenshot demonstrating how to import video footage to then drag and drop image within your design when creating a CEWE PHOTOBOOK.

Step 2: Resize and reposition the video image and QR code

You can resize and reposition the generated film strip as much as you would like using the same controls as you would use to manipulate an image. The frame can be adjusted and moved into position and the QR code can also be moved and resized.

Important to note: The QR code allows for the video to play once the product is ordered, therefore the QR code must not be deleted.

Screenshot demonstrating the process of editing the film strip.

Step 3: How to shorten your video

Simply double-click to view the editing options. By selecting the function to shorten your video in the settings tab, you can shorten the length of your video. Click on the slider to shorten your video and then drag the trim marks across.

Screenshot demonstrating the process of shortening the video footage.

Step 4: How to edit your film strip

You can now change the film strip orientation, change the representative image with film strip, as well as selecting the colour of the film strip.

How do you change the representative image?

Select the image you want to change. Navigate to the "Representative images" tab located at the bottom of the page. Here, you will be able to view still frames from your video. Scroll through all the stills from your video by using the slider bar. Once you have found the image you wish to use, select it and click "Add to film strip".

How do you add multiple images to the film strip?

In the Video editing panel, go to Number of images and choose the number of images you want to add (between 1-6). Next, on the left-hand side of the film strip, click on the frame you want to add an image to. Then, select "Representative images" at the bottom of the page, and choose a still frame from your video that you want to use for your film strip. Finally, click "Add to film strip" to add the image to your film strip.

How do you change the colour?

To choose the border colour for your film strip, head over to the right side of the page and look for the option called Film strip colour. You can select from a variety of popular colours by using the drop-down arrow or choose a custom colour from the full spectrum of colours by selecting "Select a colour". Once you've made your decision, simply click the "Save" button located at the bottom right of the page to save your changes.

Screenshot demonstrating changing the border colour of your film strip.

If you don’t like the default look film strip, you can change the appearance of it by applying any of our masks and frames.

Should you wish to delete the filmstrip and you’d like the contents of the video to be a surprise, you could even delete the filmstrip leaving only the QR code for the reader to scan when the book is printed!

As a final step: Scan the QR code and watch your story come to life!

Once your photo book has been printed, all you need to do is scan the QR code using your phone’s camera or a QR code reader to view the video.

Screenshot demonstrating how to remove the film strip as an option and only include the QR code.

Our bonus tip: The same steps can be followed to add videos to some of our other products, which include: Wall Art, Calendars and Greeting Cards.